How Can We Help?

1 – Introduction
This article describes how to configure Damaris RM to use SAML SSO (Single Sign On) connector.
2 – Pre-requisits
To use SAML SSO connecteor you need to provide several information:
- SAML Server’s certificate
- Damaris RM declared Company name which will use SAML SSO connector
- ADFS downloaded meta data
3 – Installation
Step1. SAML Server Certificate Installation
Import ADFS certificate in Tomcat keystore. Please ask system administrator to send you public ADFS certificate.
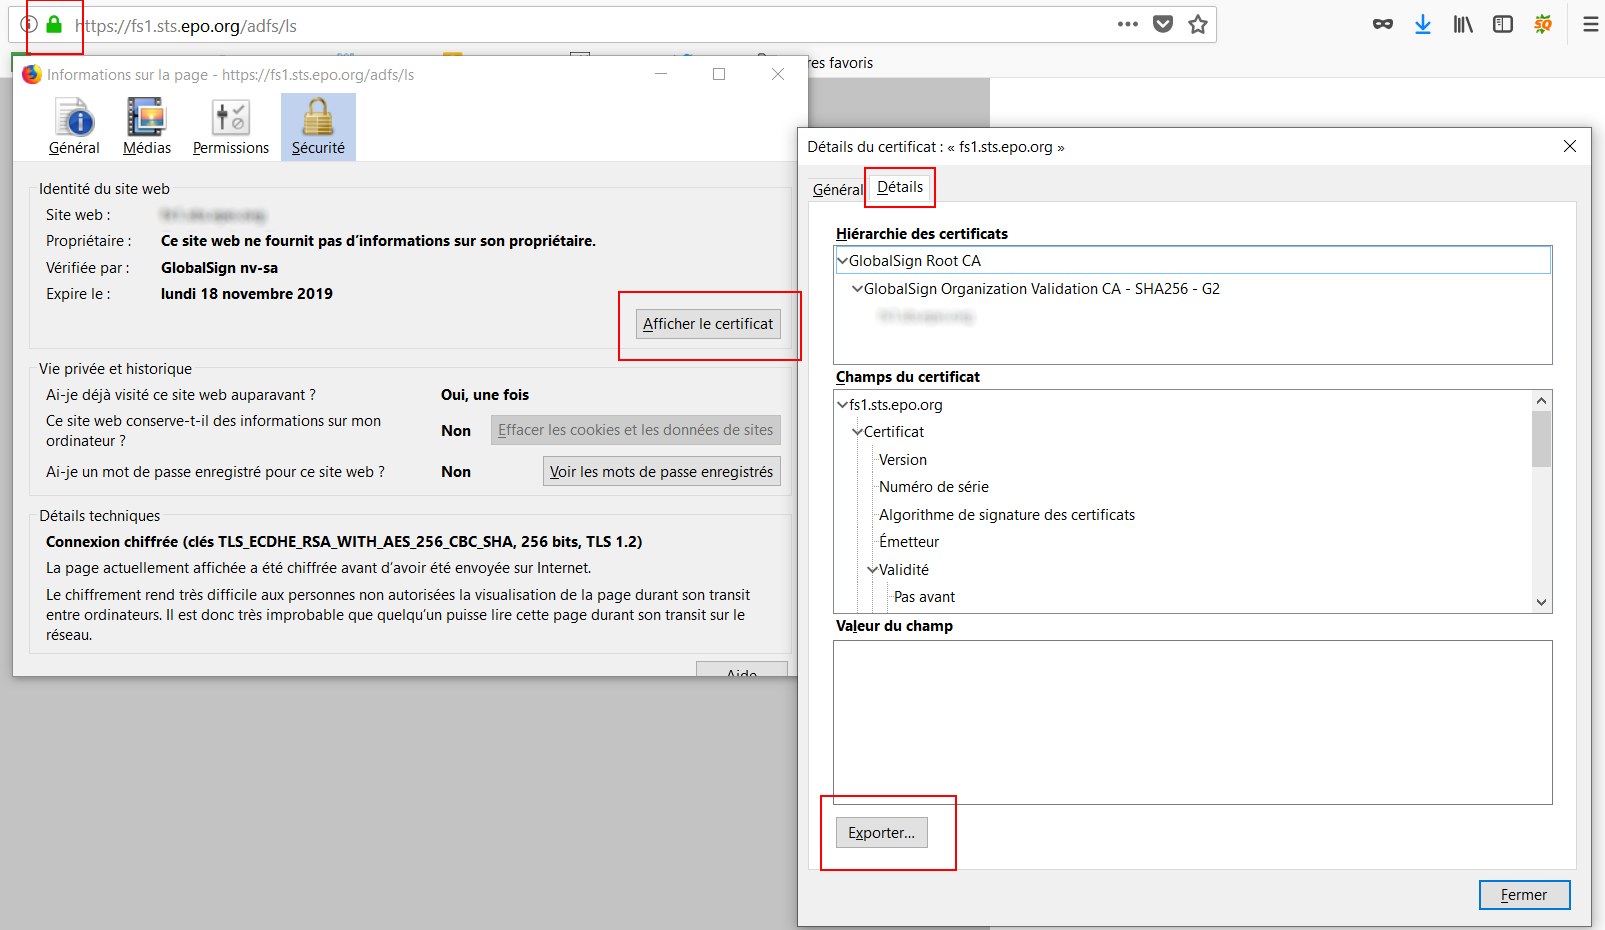
You also can connect to the server by using a Browser (Firefox or Google Chrome) and download the public certificate.
Here is a screenshot of certificate down process:

The following command could be used as a sample:
keytool -import -trustcacerts -alias hrboss.local -file D:/Share/licenses-certificates/hrboss.local.crt -keystore src\main\resources\tomcat\tomcat-ssl.keystore
Step2. Configure Damaris RM’s SAML Option
Modify ../webapps/DamarisRM/WEB-INF/config/dgs3g.properties file and set the company name that you want to use to the field useSAMLforCompany:
useSAMLforCompany=DAMARIS_RM_COMPANY_NAME
For example, if you declared « Damaris » company, so you have to configure the value as follows:
useSAMLforCompany=Damaris
Step3. Configure Spring Context XML File
Modify ../webapps/DamarisRM/WEB-INF/spring-context-security.xml file and
- Find tag <authentication-provider ref= »samlAuthenticationProvider »/> and uncomment it.
- Uncomment block which starts with <!–Spring SAML Configurations Start–> and ends with <!– Spring SAML Configurations End –>
- Find tag <beans:property name= »entityId » value= »damarisrm-saml-entity-id »/> and replace damarisrm-saml-entity-id by cfs-saml-id.
Step4. Update idp.xml ADFS Meta Data File
Replace ../webapps/DamarisRM/WEB-INF/classes/saml/idp.xml with production ADFS metadata file.
Step5. Replace Login Form HTML Page
- Rename ..webapps/DamarisRM/loginForm.xhtml into ..webapps/DamarisRM/loginCustom.xhtml
- Rename ..webapps/DamarisRM/loginForm_SAML.xhtml into ..webapps/DamarisRM/loginForm.xhtml.
Step6. Restart Tomcat
Restart Tomcat
Step7. Generate Meta Data
Generate metadata file using following URL: https://YOUR_HOST/DamarisRM/saml/metadata
Step8. Send Generated Meta Data to ADFS Server
Send metadata file generated at step7 to your Administrator and ask to configure production ADFS server.
Step9. SAML Test
After execution of step8, test SSO by trying to login.
4 – Configuration
You can configure Damaris RM to create automatically connecting users.
Please choose Administration / Company menu.
Select the company and click on EDIT button.
A similare popup opens:

Select « Create User » to ask Damaris RM to create SAML connecting users to be created.
Here you can choose which SAML Group corresponds to Damaris RM’s Department and role.
If don’t want Damaris RM to automatically create users, please uncheck the option. In that case, you will need to pre-create authorized users or to synchronize users list with AD Sync Task.
